Ride1up Core 5 ebike gear modification

When my brother recently upgraded to a newer model ebike, he gave me his older one - a model Core 5 from Ride1up. I've been using it for transportation instead of my car far more than I expected.

As many other Core 5 users have noticed, I find that the highest gear is not nearly high enough. The highest gear (7) is fine when at pedal assist levels 1,2,3, or 4. But at the highest assist level (5) it's difficult to spin the pedals fast enough to keep up with the bike. One can rotate the pedals slowly (i.e. not keeping up with the bikes motion) and this will keep the cadence sensor active, but I don't find this is a comfortable way to ride, and besides I want to be able to add some human power to the bike even at level 5 assist both to go faster when I want and to get some excersize. But it is simply to hard to spin the pedals fast enough to do that. The bike really needs a higher gear ratio.

I noticed this problem soon after I started riding the bike, but it became even more problematic when I changed the tires which had become worn (and more prone to flats) with about 3300 miles on them. These are the tires I bought (from Amazon). These aren't nearly as good on the trail as the original knobby tires that come with the Core 5, but they are much better (and faster) on the road which is where I usually ride. After the tire change, the problem I had with level 5 assist was also happening at level 4 assist because the bike was going much faster for a given power level.

My first idea for increasing the gear ratio of the highest gear was to change out the cassette. The stock cassette is the Shimano CS-HG200-7 which has gears 12,14,16,18,21,24,32T.

The smallest gear the derailleur can accommodate is 11T and I found a cassette that included an 11 tooth gear - The Sunlight 7 speed cassette which has gears 11,13,15,18,21,24,34. I decided that would be a useful change and relatively simple to accomplish.

Here is what the new cassette looks like on the bike.

The current price for this cassette on Amazon is $17.28. See it here.

The new cassette increases the top gear ratio by about 9% (12/11 = 1.091). That's a noticeable improvement, but not really that significant.

- This picture is a thumbnail.
- Click on it see full size picture.
- Then click the back button to continue.
All the other pictures on this page are also thumbnails.

Since I wanted more than a 9% increase in the top gear, the only other possibility was to change the chainring. I decided to try to change the stock 46T chainring, to a 56T which would net a 21.7% increase in the highest gear ratio, Including the effect of the new cassette would result in a total 33% increase over the stock bike. One problem with this idea is that there is not a lot of clearance between the chainring and the chain stay. There is enough clearance for a somewhat bigger chainring, but I couldn't be sure if a 56T chainring would work without trying it. A bigger challenge was that I couldn't find a 56T chainring with the same kind of direct mounting used with the stock chainring. (Perhaps such a thing exists, but I couldn't find it.) I came up with an idea to solve both problems. I bought the following 56T chainring: Chainring from Amazon

This uses 5 mounting holes located 110 mm from the gear center point, but since the core5 doesn't use this chainring mounting method it can't be used without making some modifications. My plan was to add some mounting holes and screw the new chainring onto the outside of the old one. This would move the 56T chainring about 3mm farther away from the chain stay which means that I wouldn't have to be concerned about the chain stay clearance.

The first step was to remove the chainring and crank assembly from the bike. For this I purchased this Park Tool Compact Crank Puller

If you don't know how to use such a tool to remove a crank arm, watch the video at: Crank Removal and Installation - Three Piece Crank


Here is what the chainring/crank assembly looks like after the pedal and chain guard have been removed. (The 5 holes you see here were used to attach the chain guard to the chainring.) The chain guard will no longer be useful since it is too small to be of any benefit with the new chainring.


Perhaps the best way to attach the new chainring to the old one would be to drill 5 mounting holes 110 mm from the center of the old chainring (on each of the 5 arms) and then mount the new chainring using those holes. However I didn't want to modify the stock gear in case I needed to revert the bike to it's stock configuration (for reselling). So instead I decided to use the 5 holes that were already in the stock chainring. This required drilling 5 holes in the new chainring so that they align with the 5 holes in the stock chainring. The drill pattern that will do that is shown here.

The position (i.e. rotation) of the first hole is somewhat arbitrary, and is chosen so that the hole is as far away from any edge as possible. Then after the first hole is positioned, the remaining 4 holes are positioned 72° from the previous.


A machine shop should be able to drill the holes accurately according to the drill pattern diagram, but I knew that I wouldn't be able to do that (since I didn't even have a drill press). So instead of using the drill pattern, I simply clamped the two chainrings together and used the 5 holes in the stock chainring as a drilling guide. The trick is to make sure that the two chainrings are clamped together with their centers aligning. I did that mostly by eyeball, and verified using some caliper measurements.

To drill the holes in the exact center of the holes in the stock chainring, begin with the largest drill bit that will fit inside the hole and drill just for a few seconds, or long enough to dent the metal. Then switch to a small drill bit and use this dent to create a pilot hole in the right location. And finally, expand the pilot hole to it's final size using a 3/16" drill bit.

A size 8 screw has a sheer strength of about 2000 pounds, and should be adequate for this application. If you prefer even higher strength, you could choose to use 10-32 screws which would require a 13/64" drill bit. There is room for the larger hole if you are accurate enough with the drill hole placement.


Then I attached the two chainrings together using 8-32 screws, lock nuts, and lock washers and dabbed on some Loctite to insure the nuts wouldn't loosen and fall off.

Remember to click on these images to see the full resolution of the picture.


This is what the chainring looks like after it was reinstalled on the bike. You will need a new chain because of the larger gears on both the front and back. Be sure to buy a chain of the correct width for a 7 speed bike (3/32"). I bought a chain with 116 links. This is a pretty standard length, but I found that it was several inches too short, so make sure you buy a longer chain.

Although you can't tell from the picture, there is plenty of clearance between the new chainring and the chain stay. In fact I believe there is enough room for an even larger chainring (58T or 60T) if you prefer, although I found the 56T chainring to be a good choice.


Here is a graph showing the 7 gear ratios of the stock bike (green bars) and the 7 green ratios of the modified bike (purple bars). The length of the bar indicates the gear number and the y position indicates the gear ratio.

Here is the Matlab code used to create this plot:
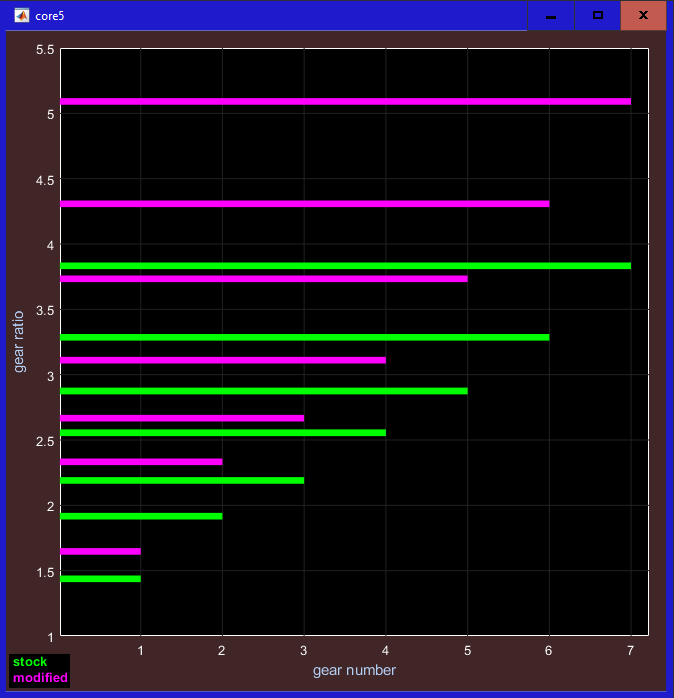
  RatioOld = 46 ./ [32 24 21 18 16 14 12];
  RatioNew = 56 ./ [34 24 21 18 15 13 11];
  Gear = 1:7;
  plt(Pvbar(RatioOld,0,Gear),Pvbar(RatioNew,0,Gear),...
     'Linewidth',5,'Xlabel','gear ratio','Ylabel','gear number',...
     'TraceID',{'stock' 'modified'});
  plt cright 0 TGLlogx;  % swap x and y axes
You can see that gear one of the modified bike is above the stock gear one, so we are sacrificing about 14% on the low end. This is a noticeable change but not that significant and the loss is well worth gain on the high end.
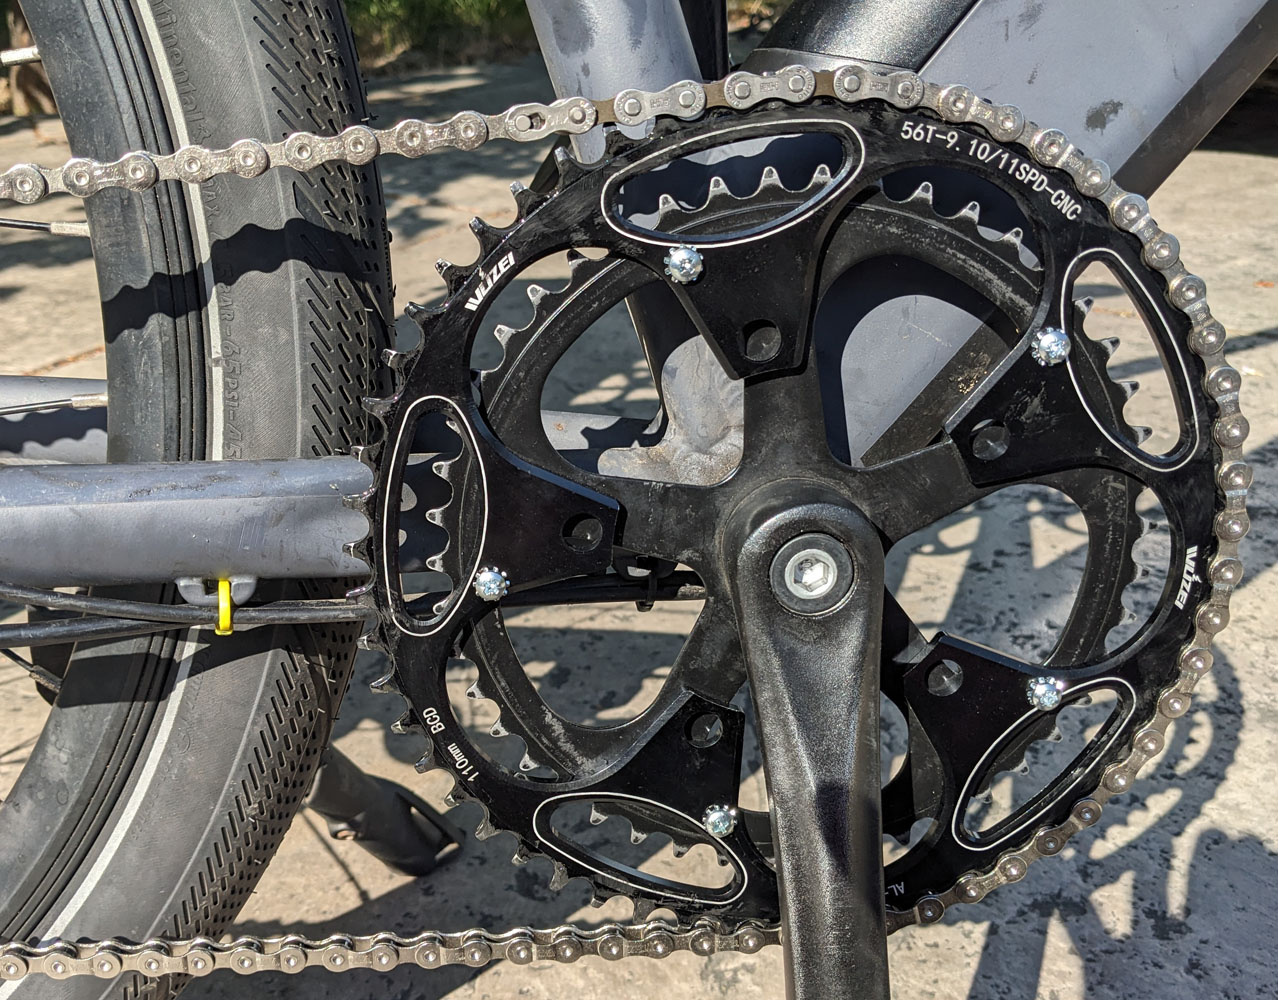
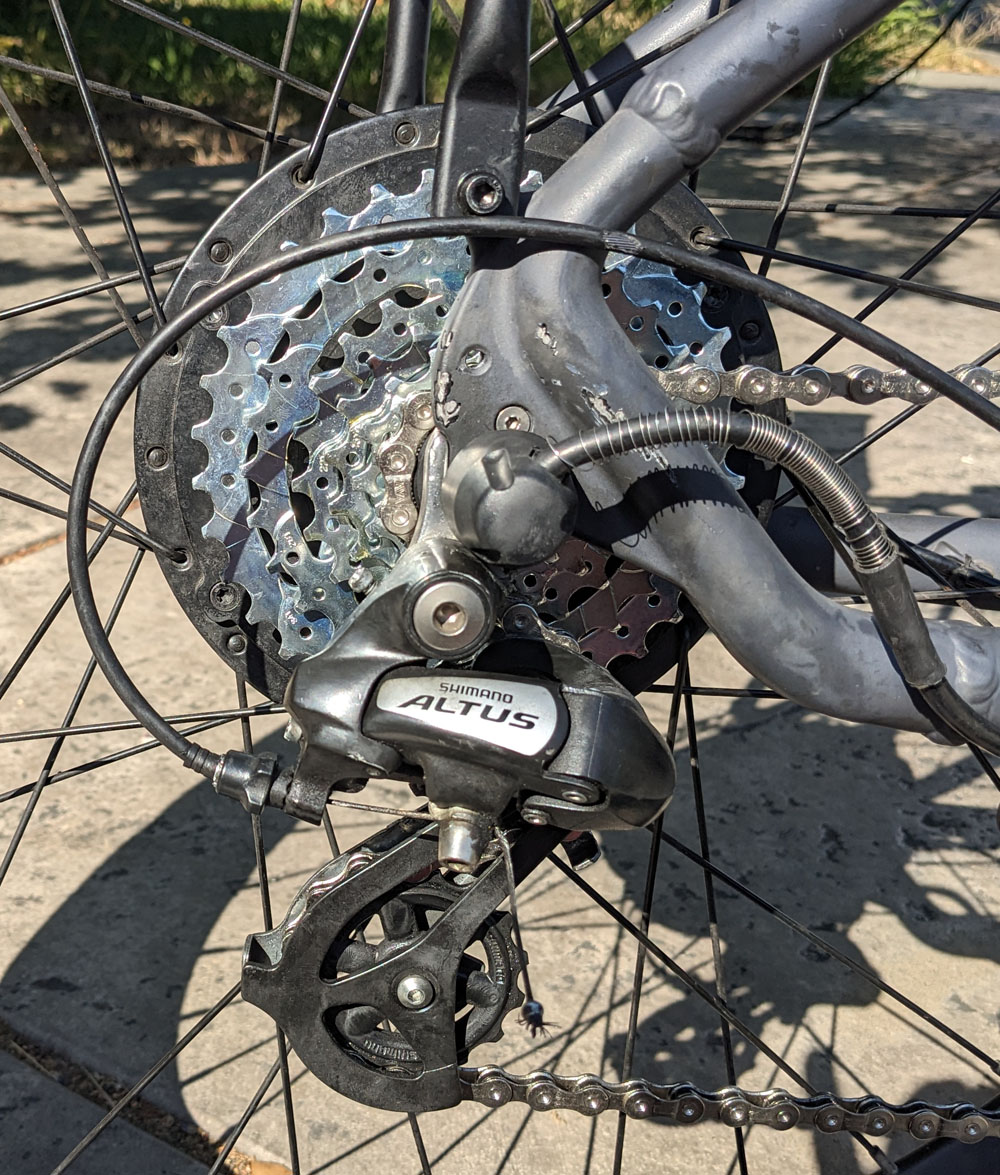
Notice that gear 5 on the modified bike is pretty close to gear 7 on the stock bike, meaning that the modified bike's gears 6 and 7 are going well into new territory.

I've ridden the modified bike about 30 miles so far and I'm extremely happy with the mods. It's like a brand new bike. I can ride along much more relaxed and still provide some human powered assistance even at level 4 and 5 pedal assist settings. I don't know how Ride1up chose the gear ratios for this bike. It doesn't seem to make sense, especially now that I can see what it can be.

In good conditions (with no headwind) I can occasionally feel the motor cut out when I exceed about 28 mph. I've considered changing the wheel diameter setting from 27.5" to something like 24". That would increase the top speed to 32 mph, although one could argue that the 28 mph limit is a good thing.

If you have any comments or suggestions about my modifications or the writeup I would love to hear from you. My email address can be found at the top level of this web site.