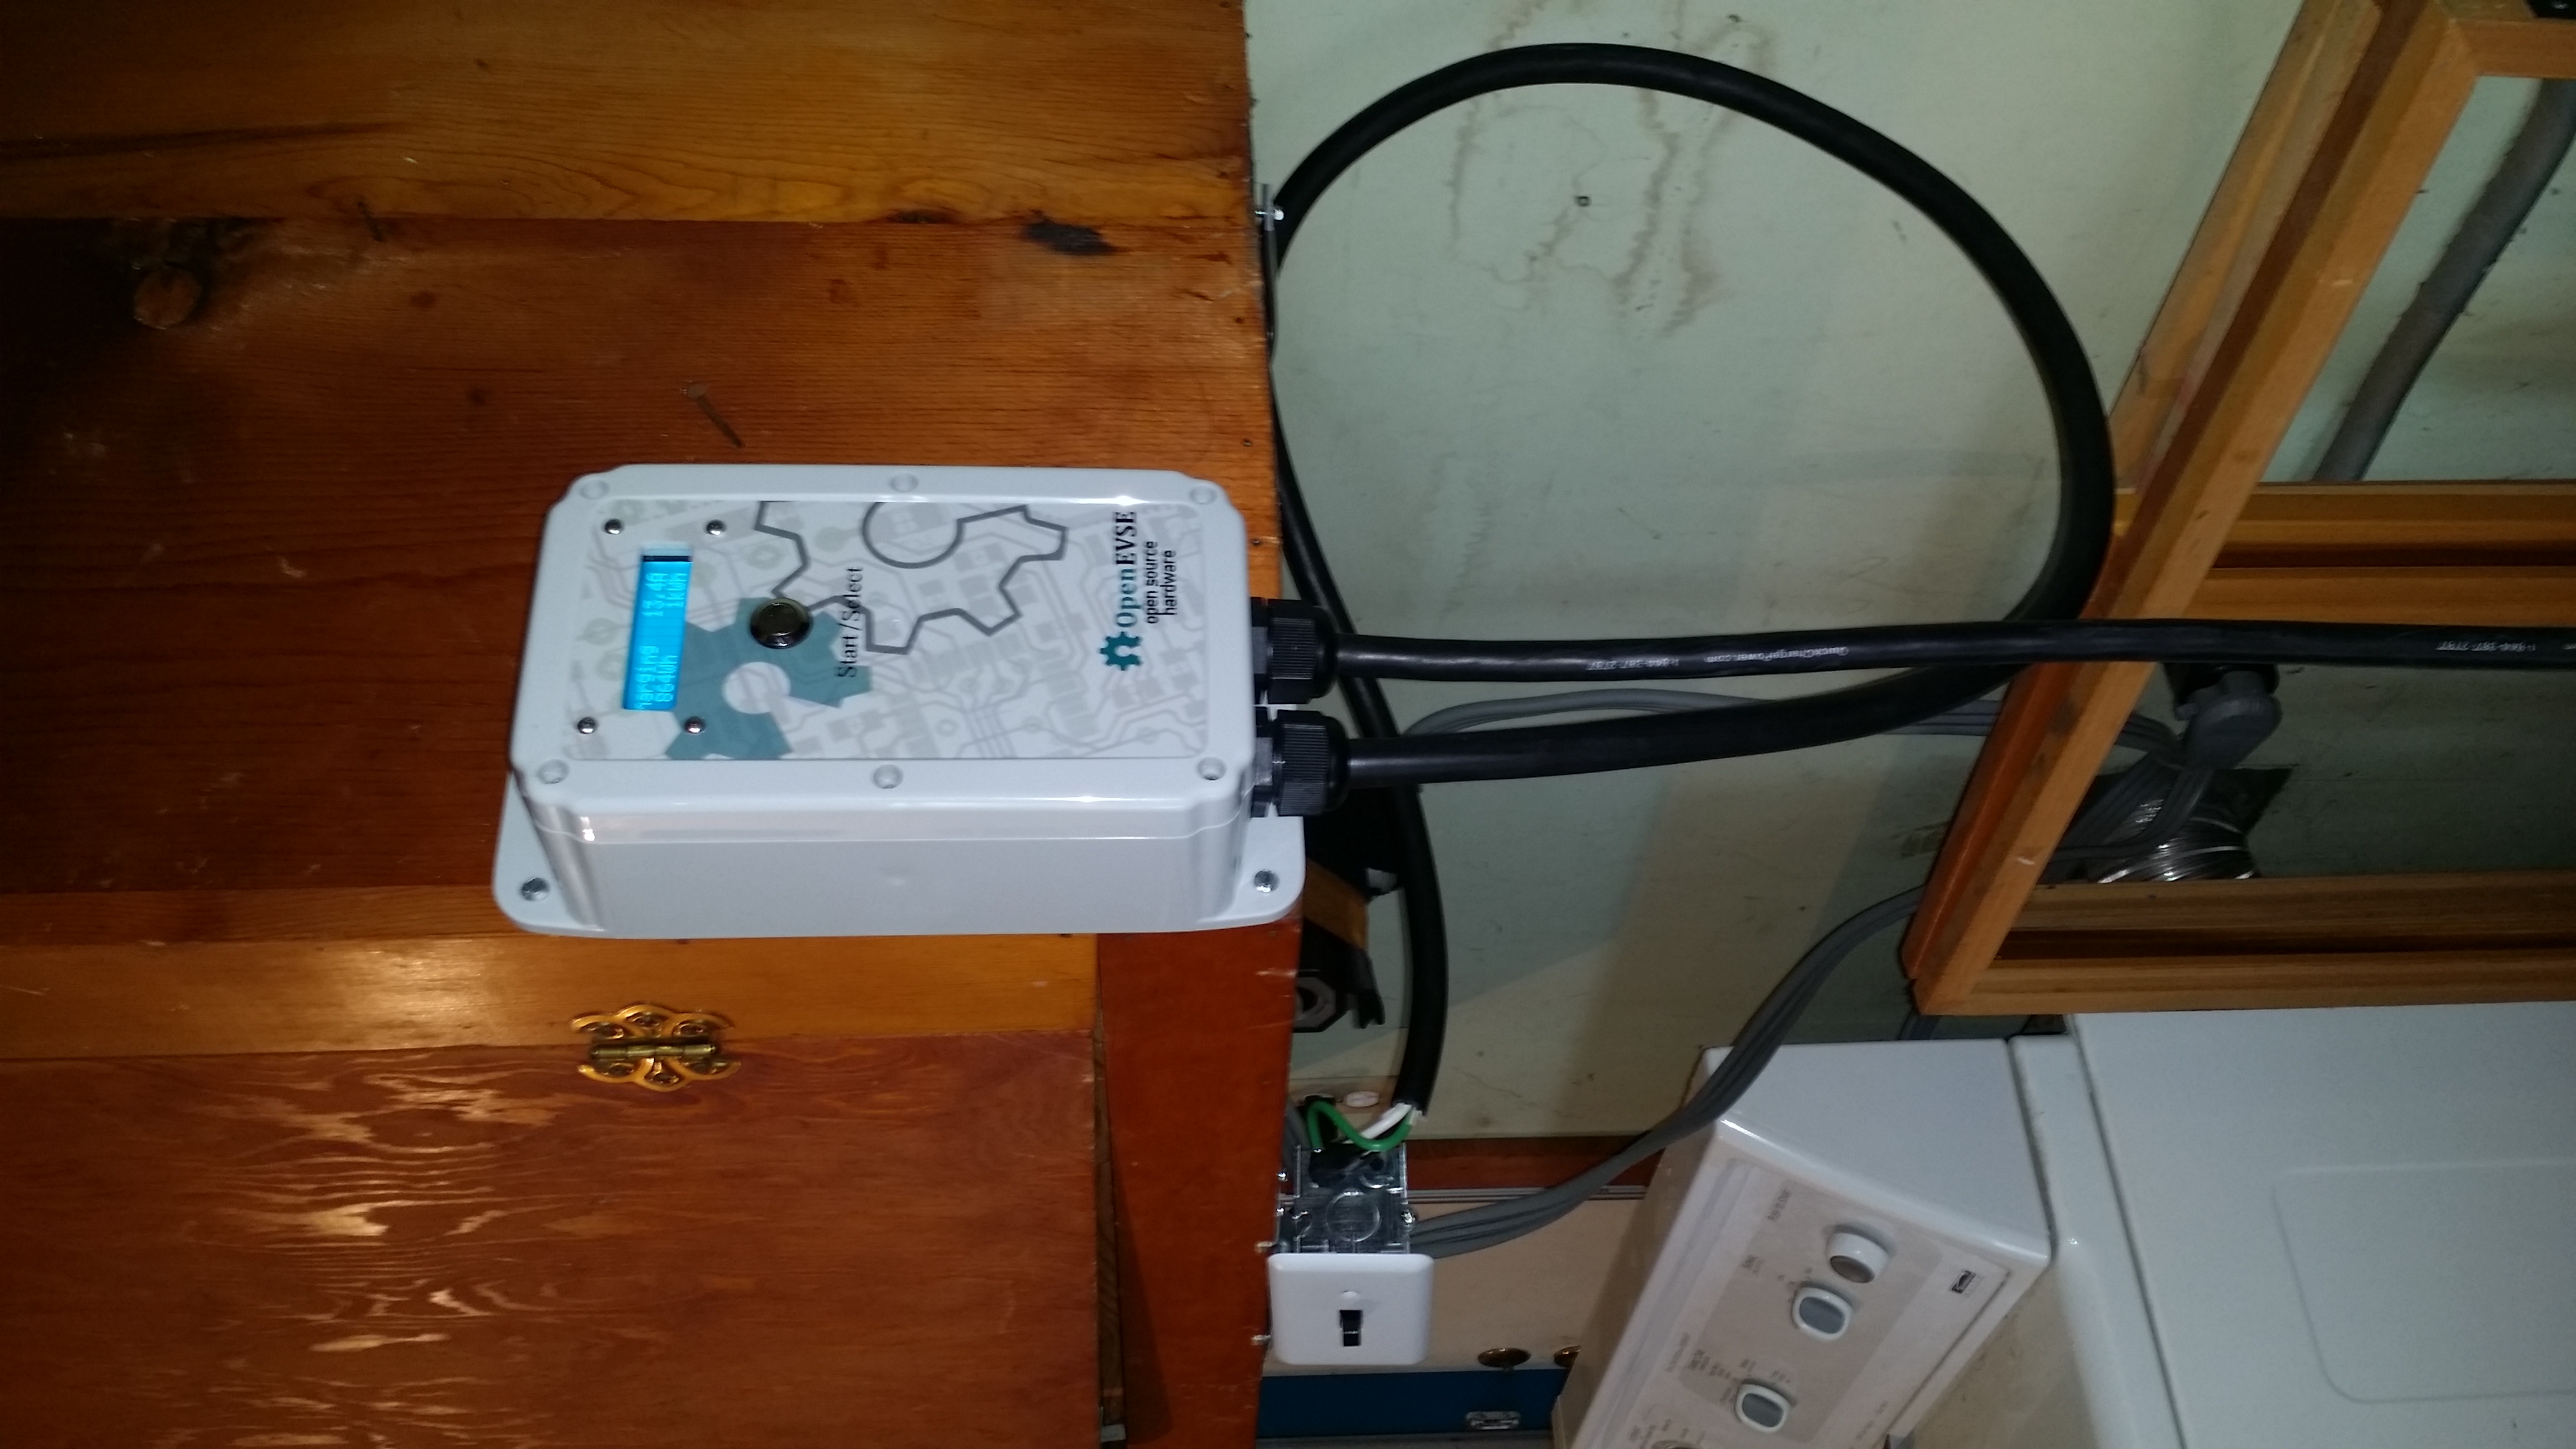
| http://store.openevse.com OpenEVSE Kit 50A Deluxe Kit $269.00 J1772 Cable 40A Ultra Flexible, 15 feet $145.00 tax & shipping |
$ 463.23 |
|
http://www.globalindustrial.com/searchResult?searchBox=&q=30211352 Item# 30211352. Bryant 3025BRN Toggle Switch, Double Pole, Double Throw, 30A, 120/277V AC. $37.95 + tax & shipping |
$ 45.21 |
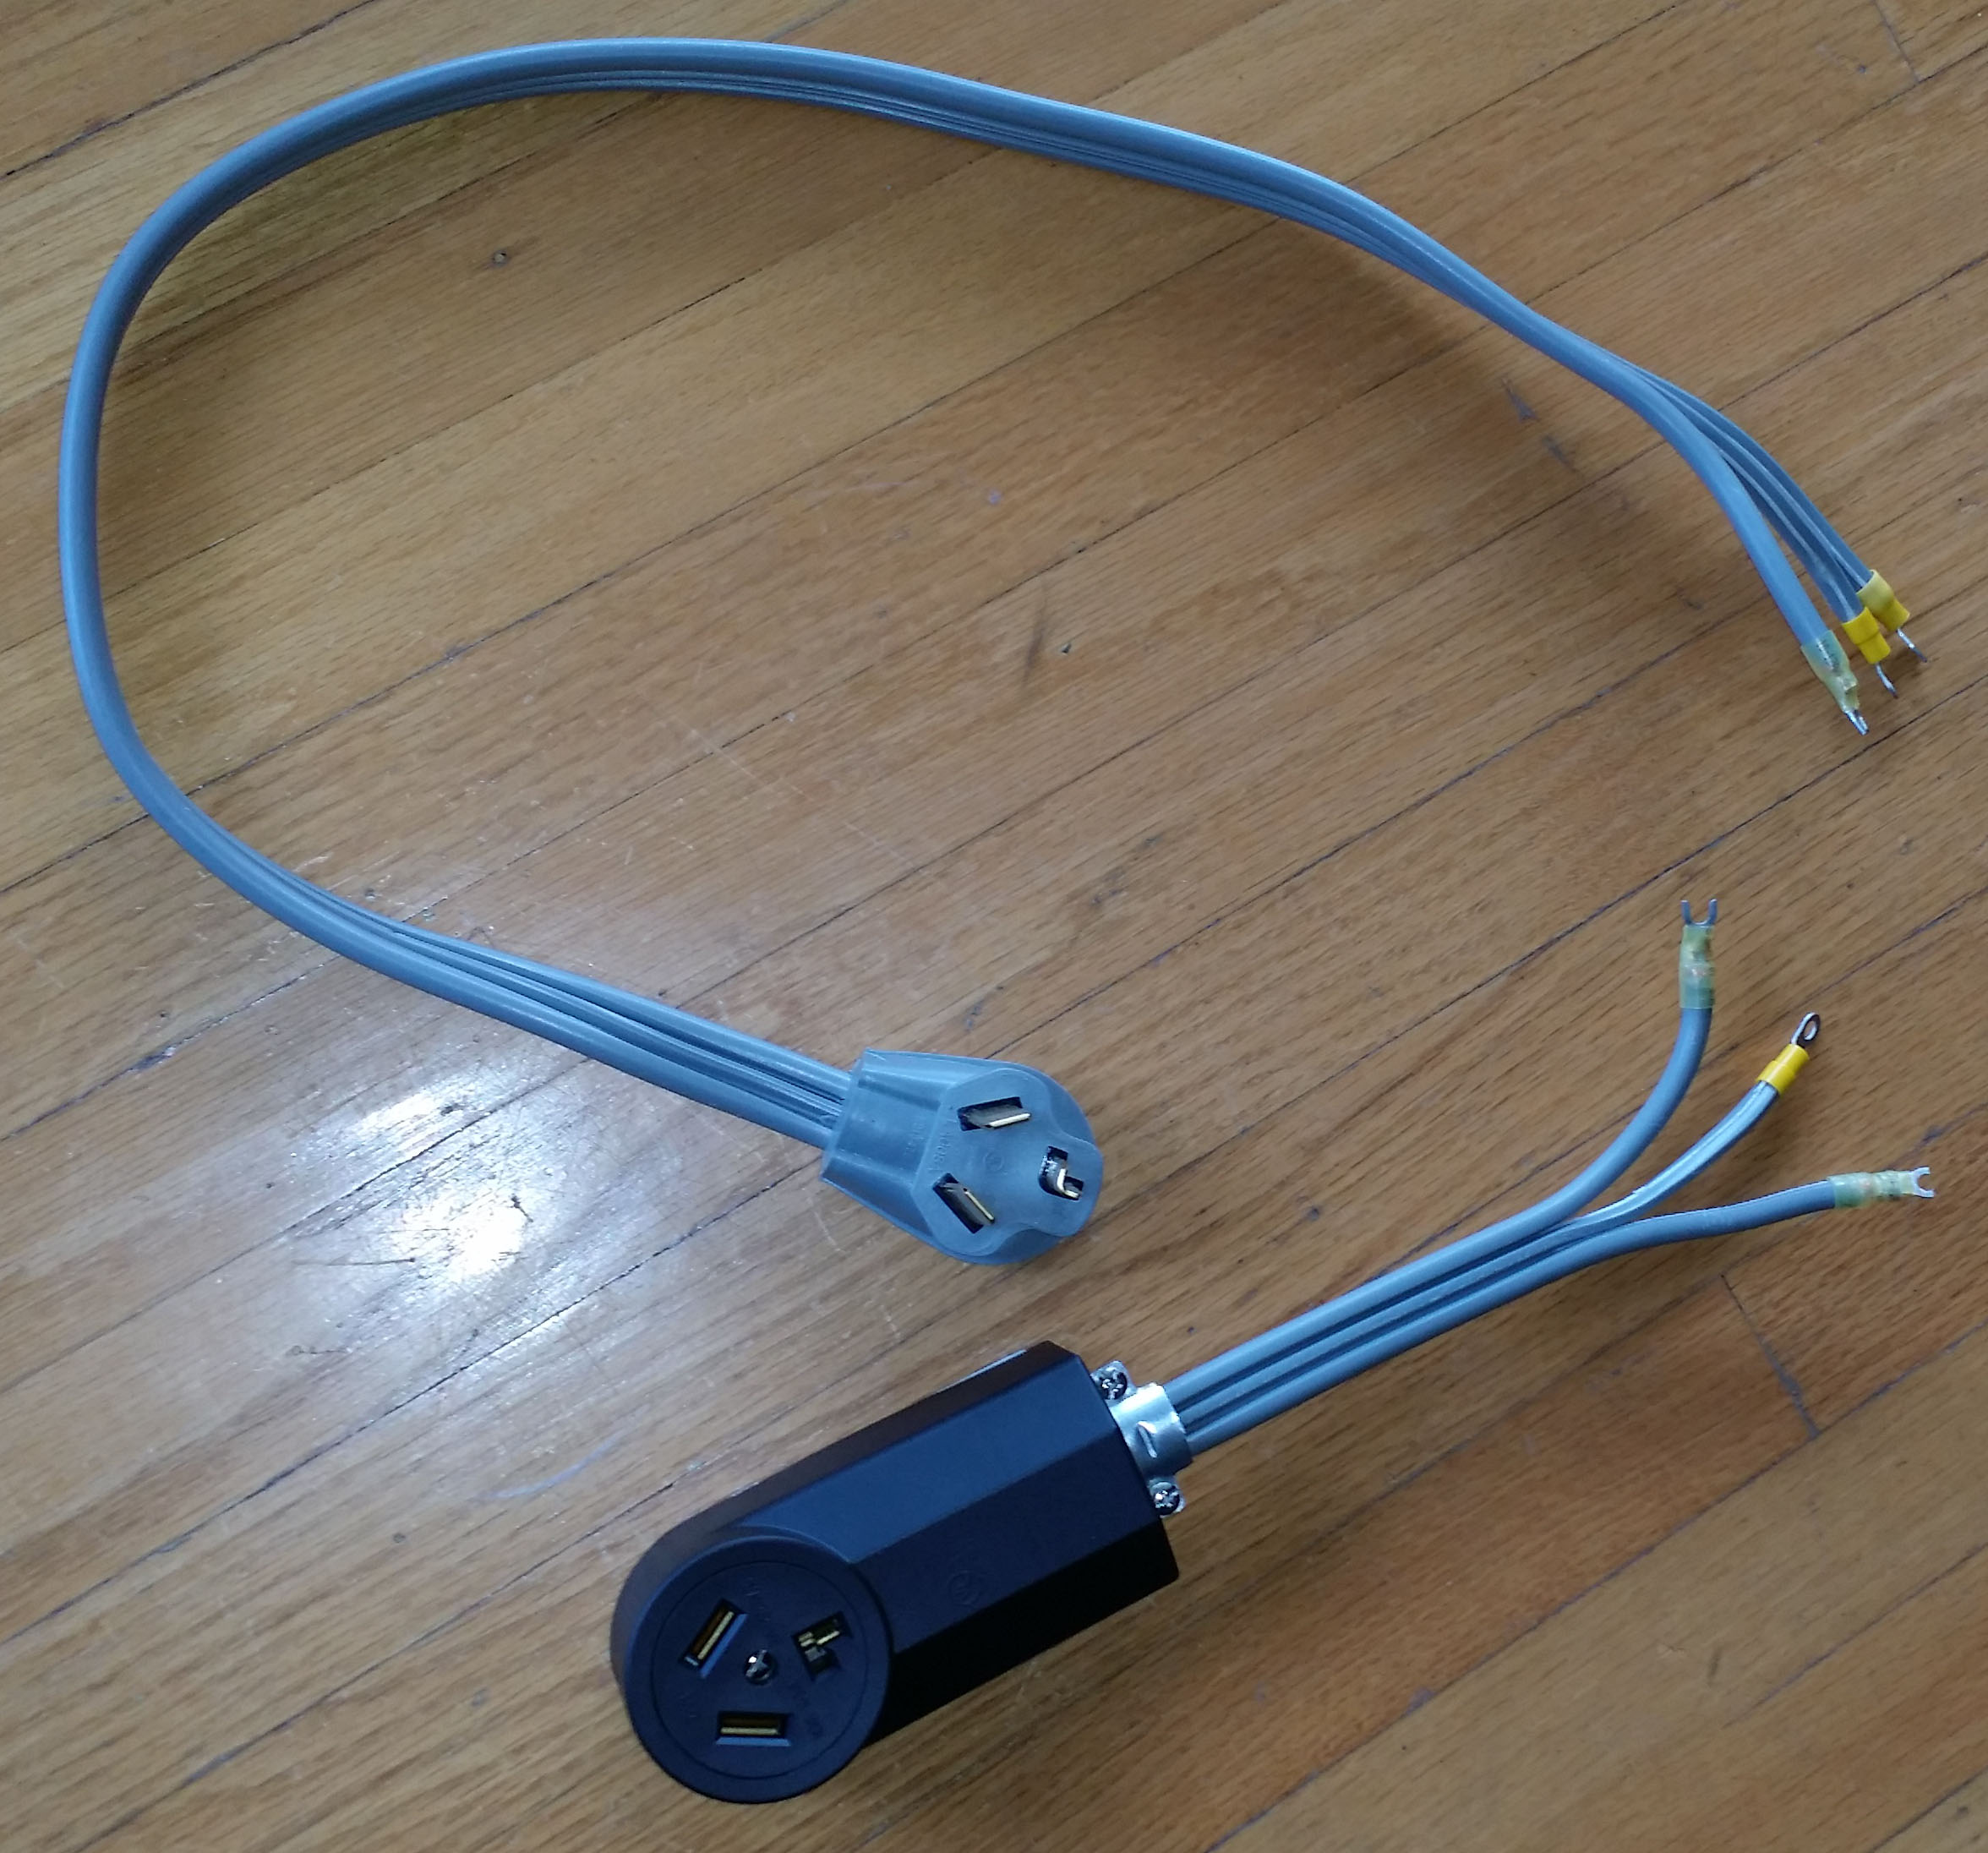
| http://www.ebay.com/itm/301882891280 4Ft Dryer Extension Cord, Female 10-30R 3-Prong Receptacle & Male 10-30P 3-pin Plug |
$ 49.95 |
| http://www.ebay.com/itm/251804920489 10/3 Electrical 600V Wire 3 Conductor Flexible cable 30amp 5ft & $1.50 per foot + shipping |
$ 13.30 |
| Home Depot 032076921262 Ring Terminals, quant 2 ($4.32/each) | $ 8.64 |
| Home Depot 785991119046 Steel Switch Box | $ 2.43 |
| Home Depot 070686571552 Switch Plate | $ 3.23 |
Total ---------------------------------------- |
$585.99 |
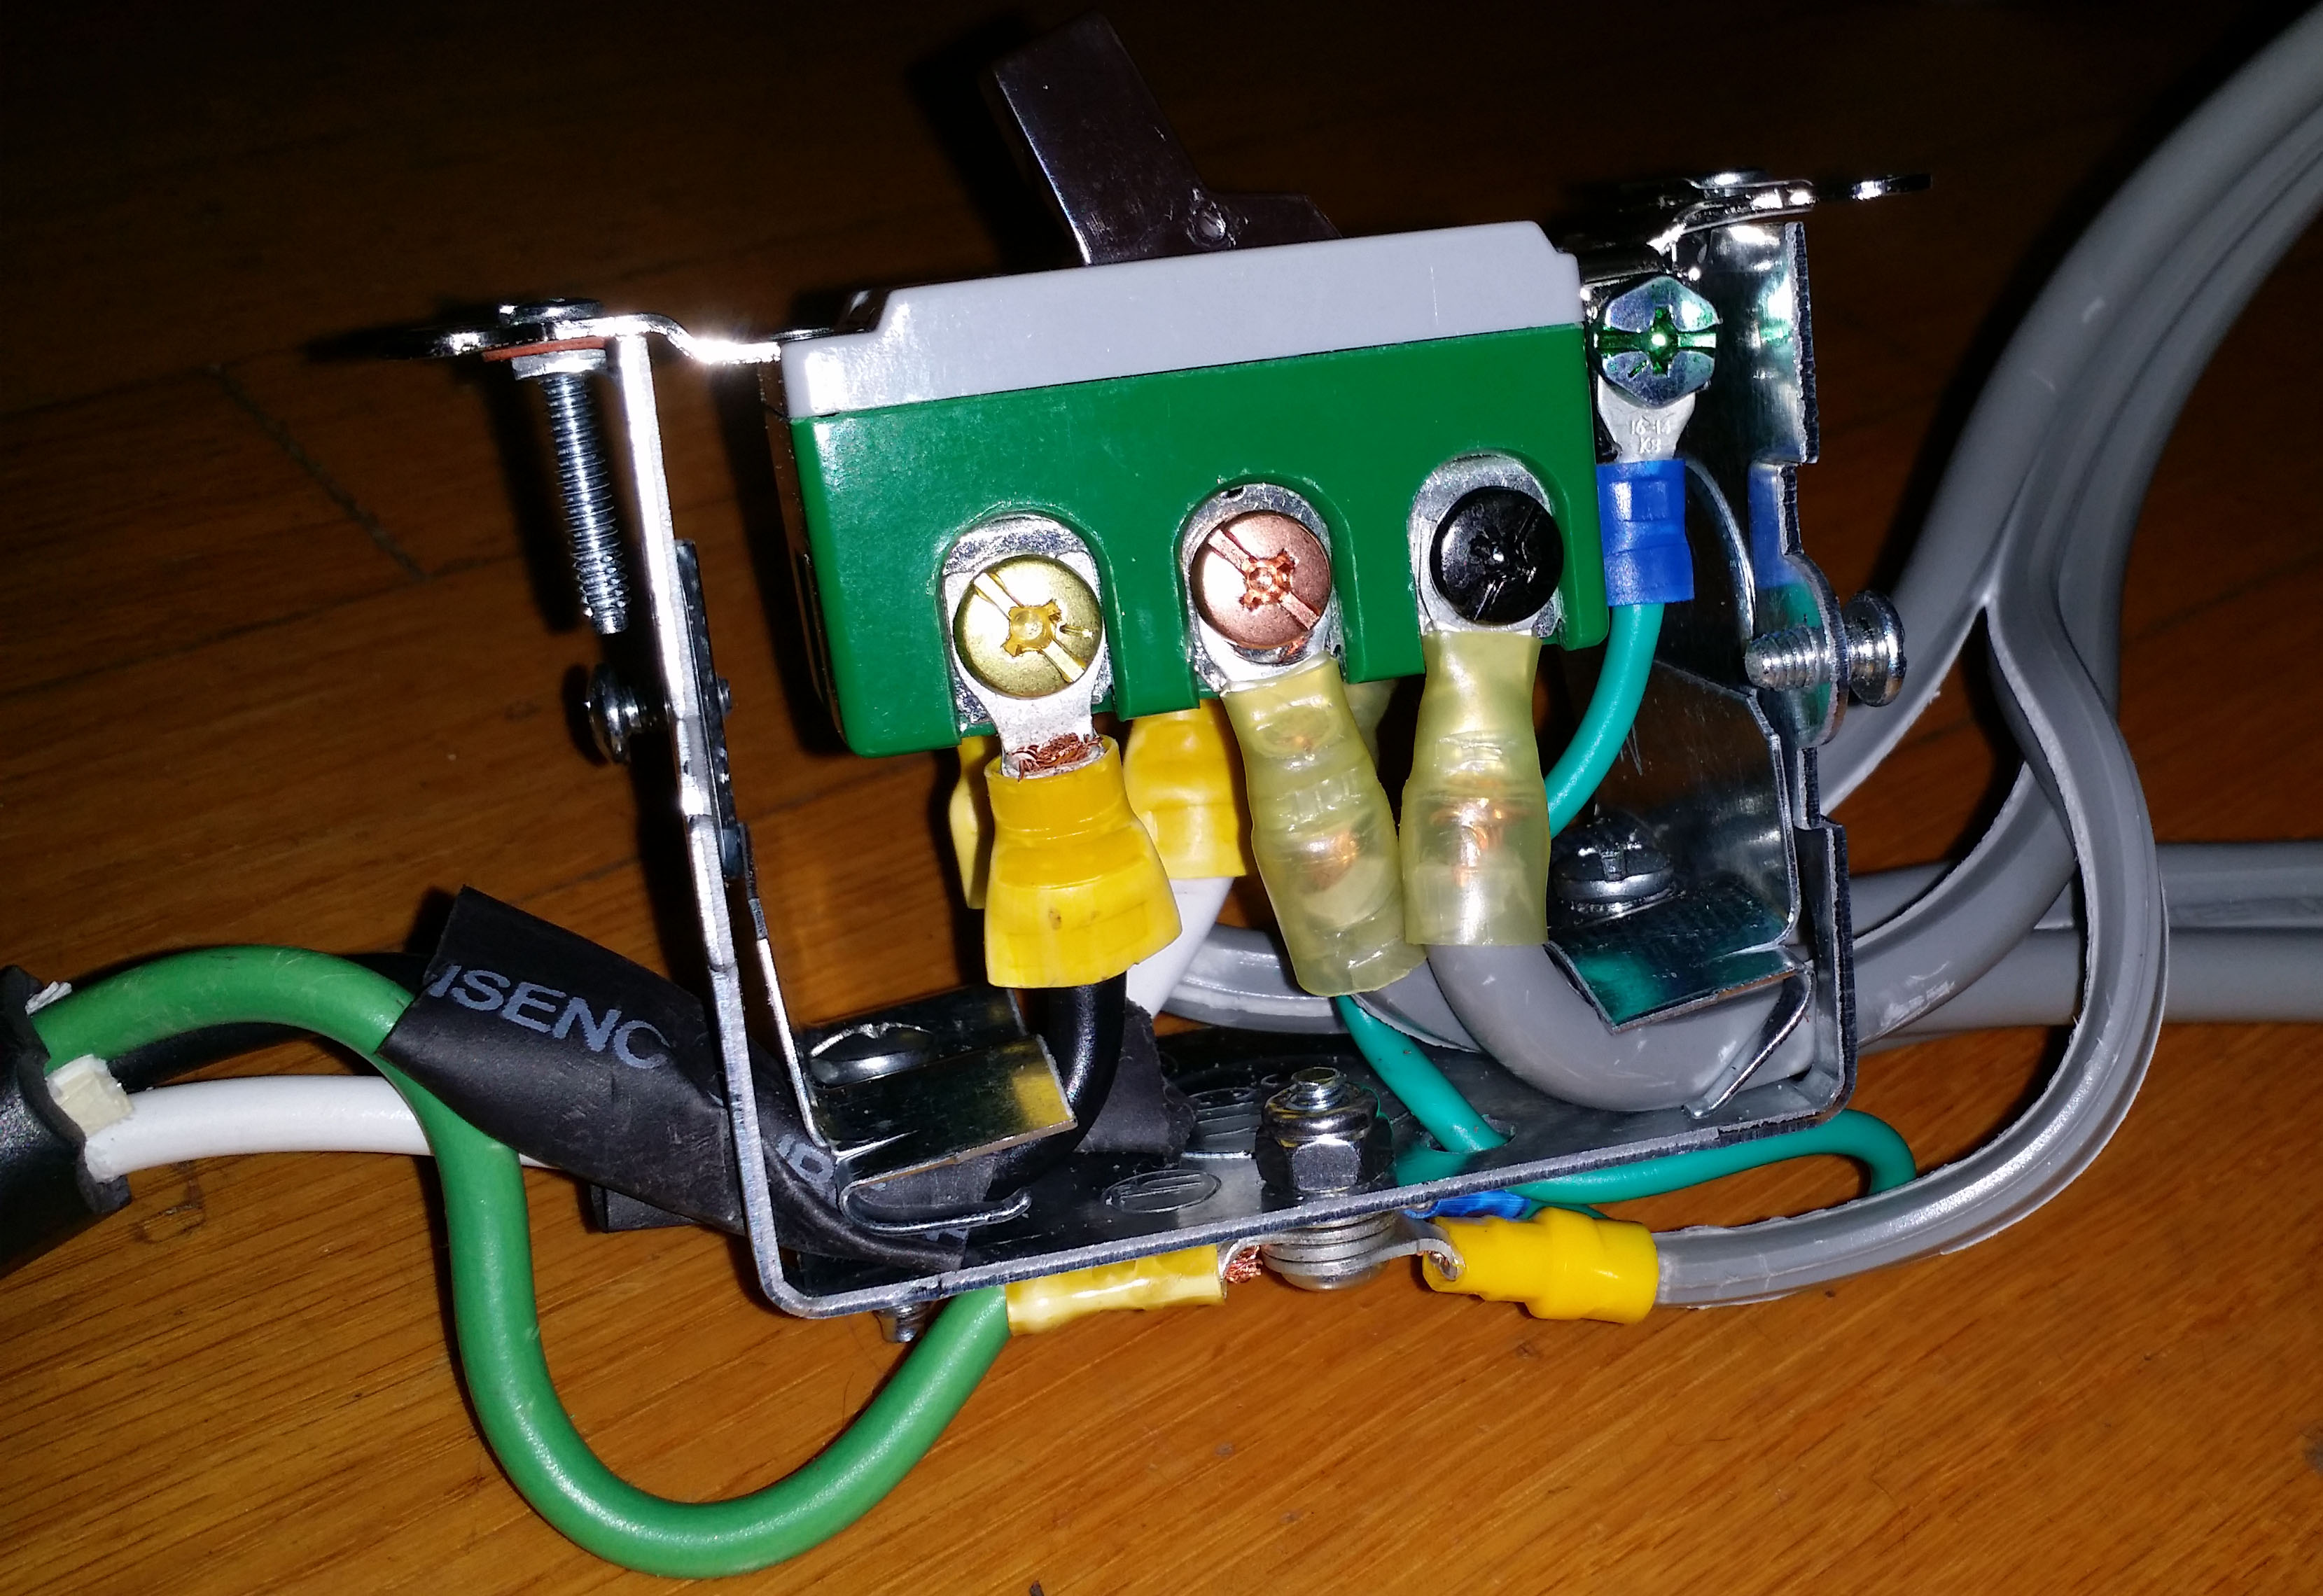
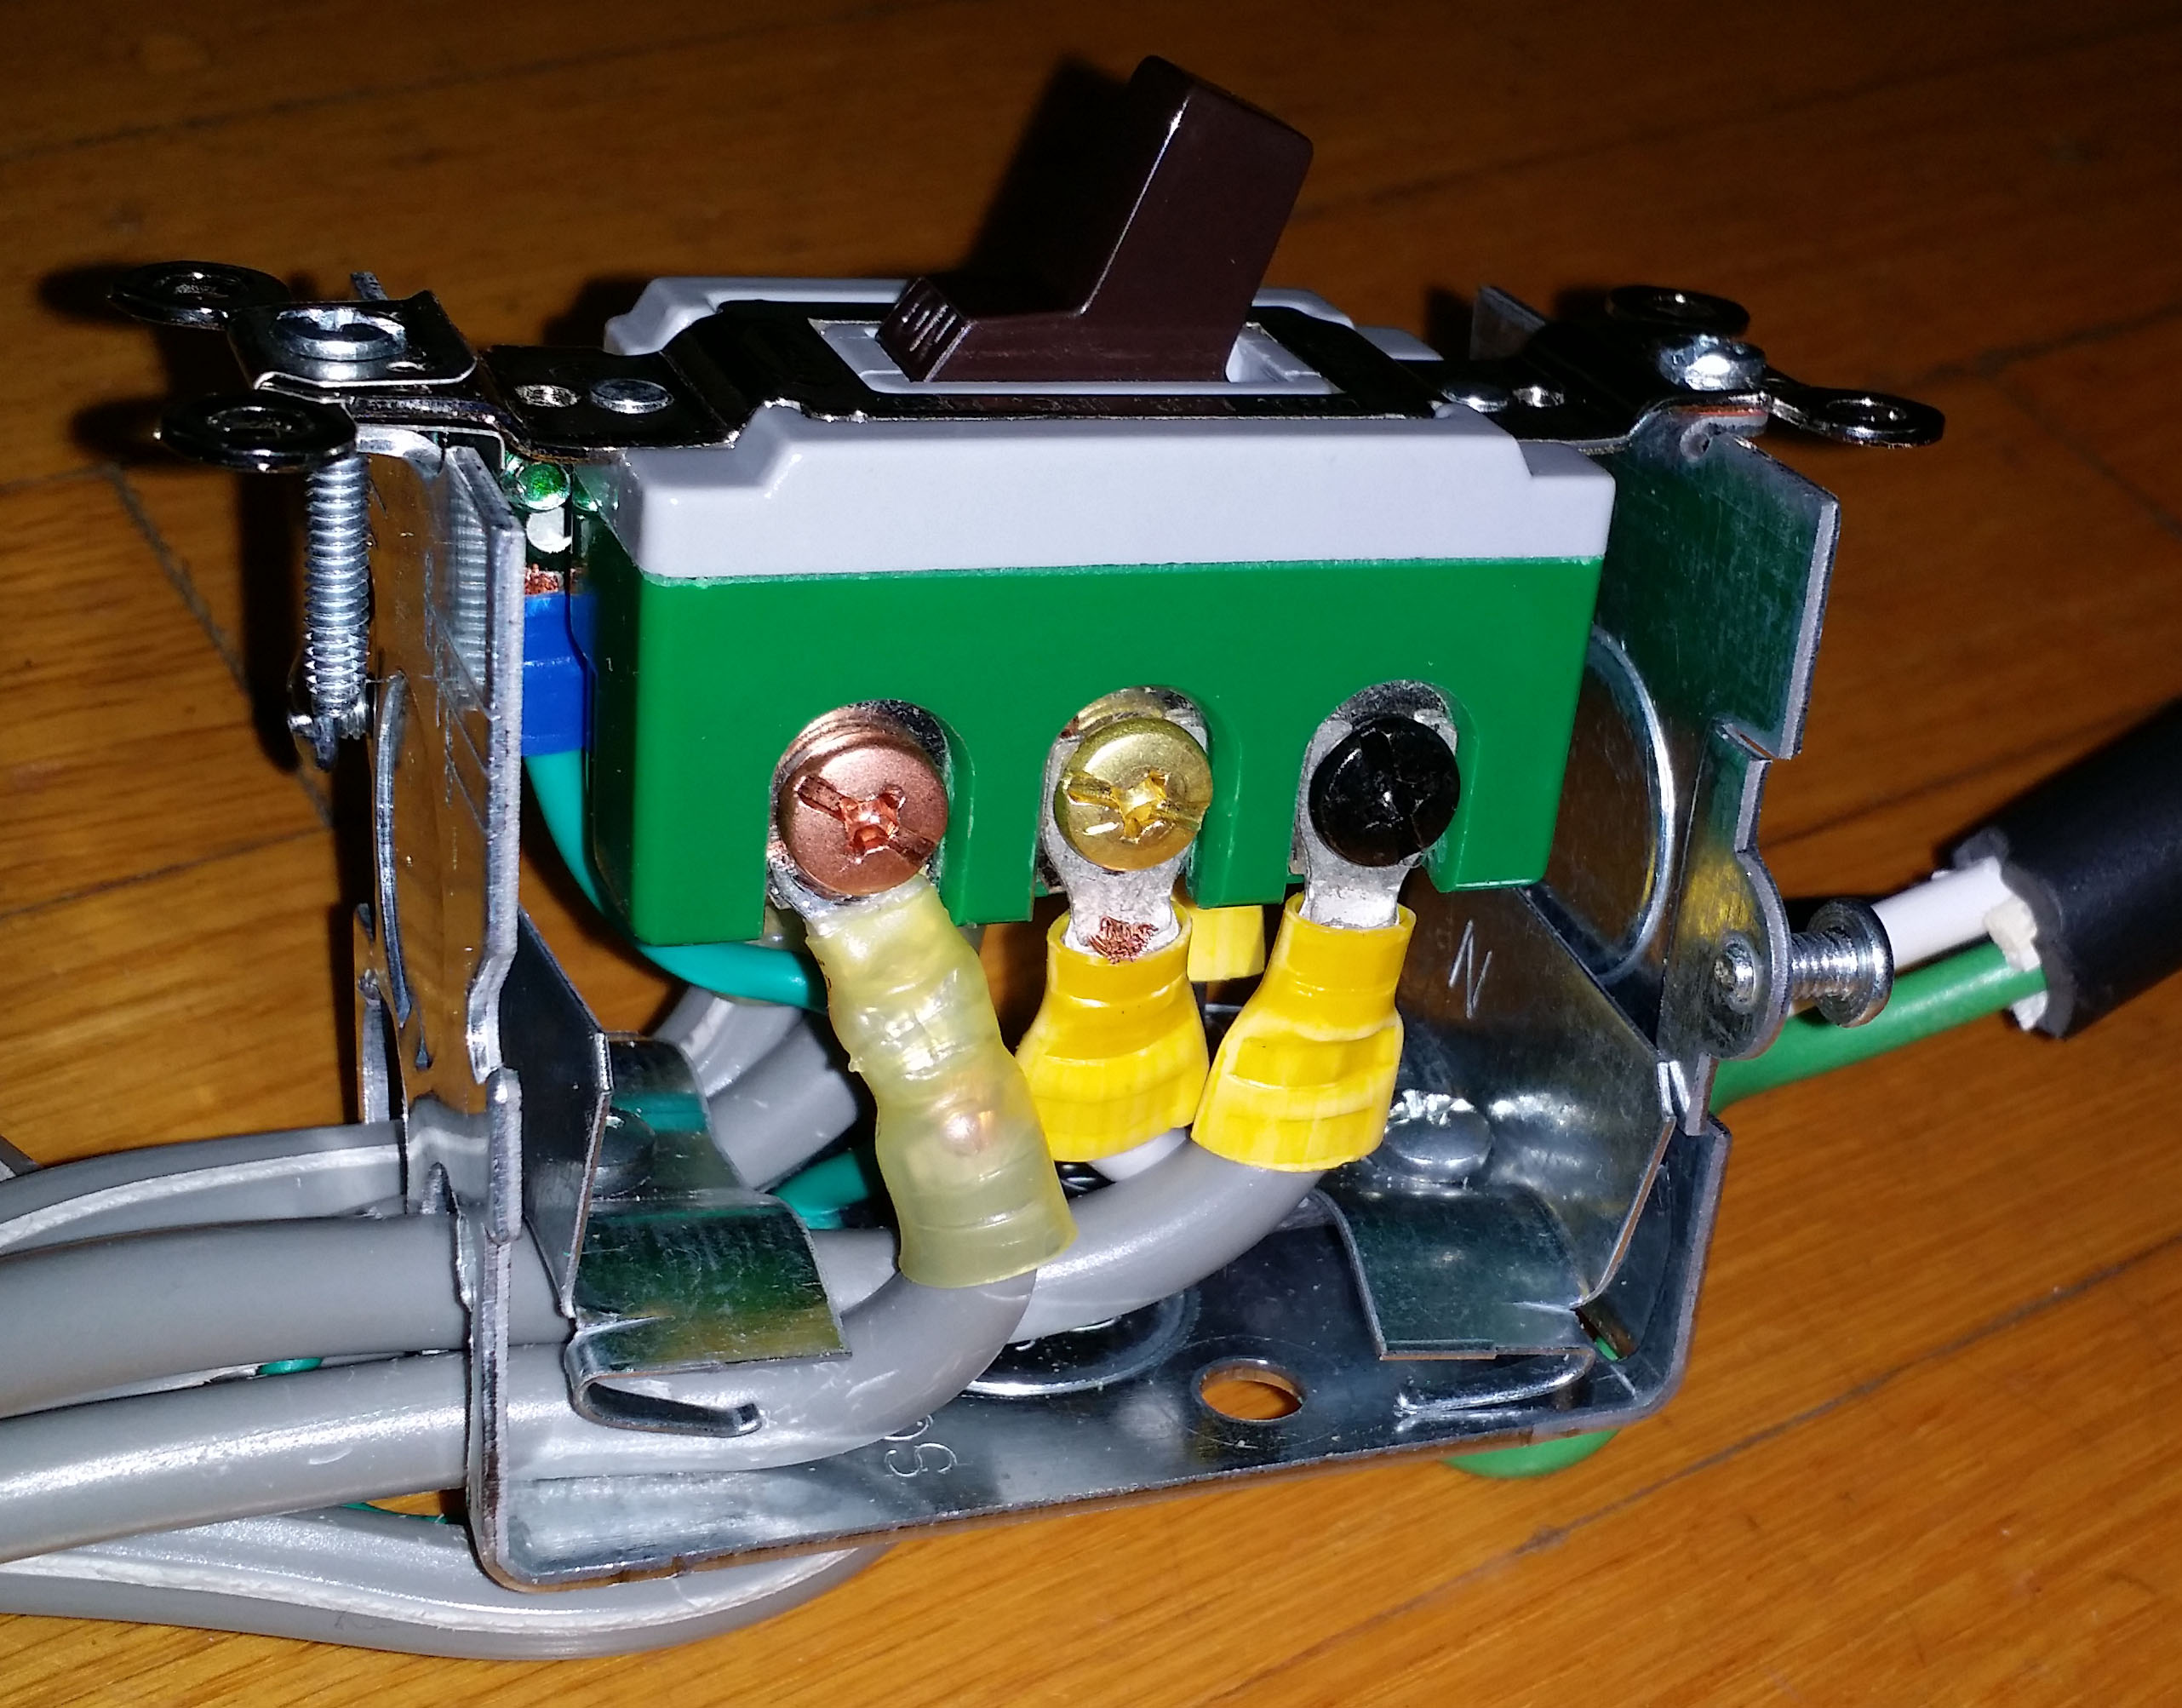 These hugely thick wires are probably overkill since my car doesn't draw more than 14A,
but since the dryer breaker trip point is 30A I thought it wise to use wiring that can handle that much.
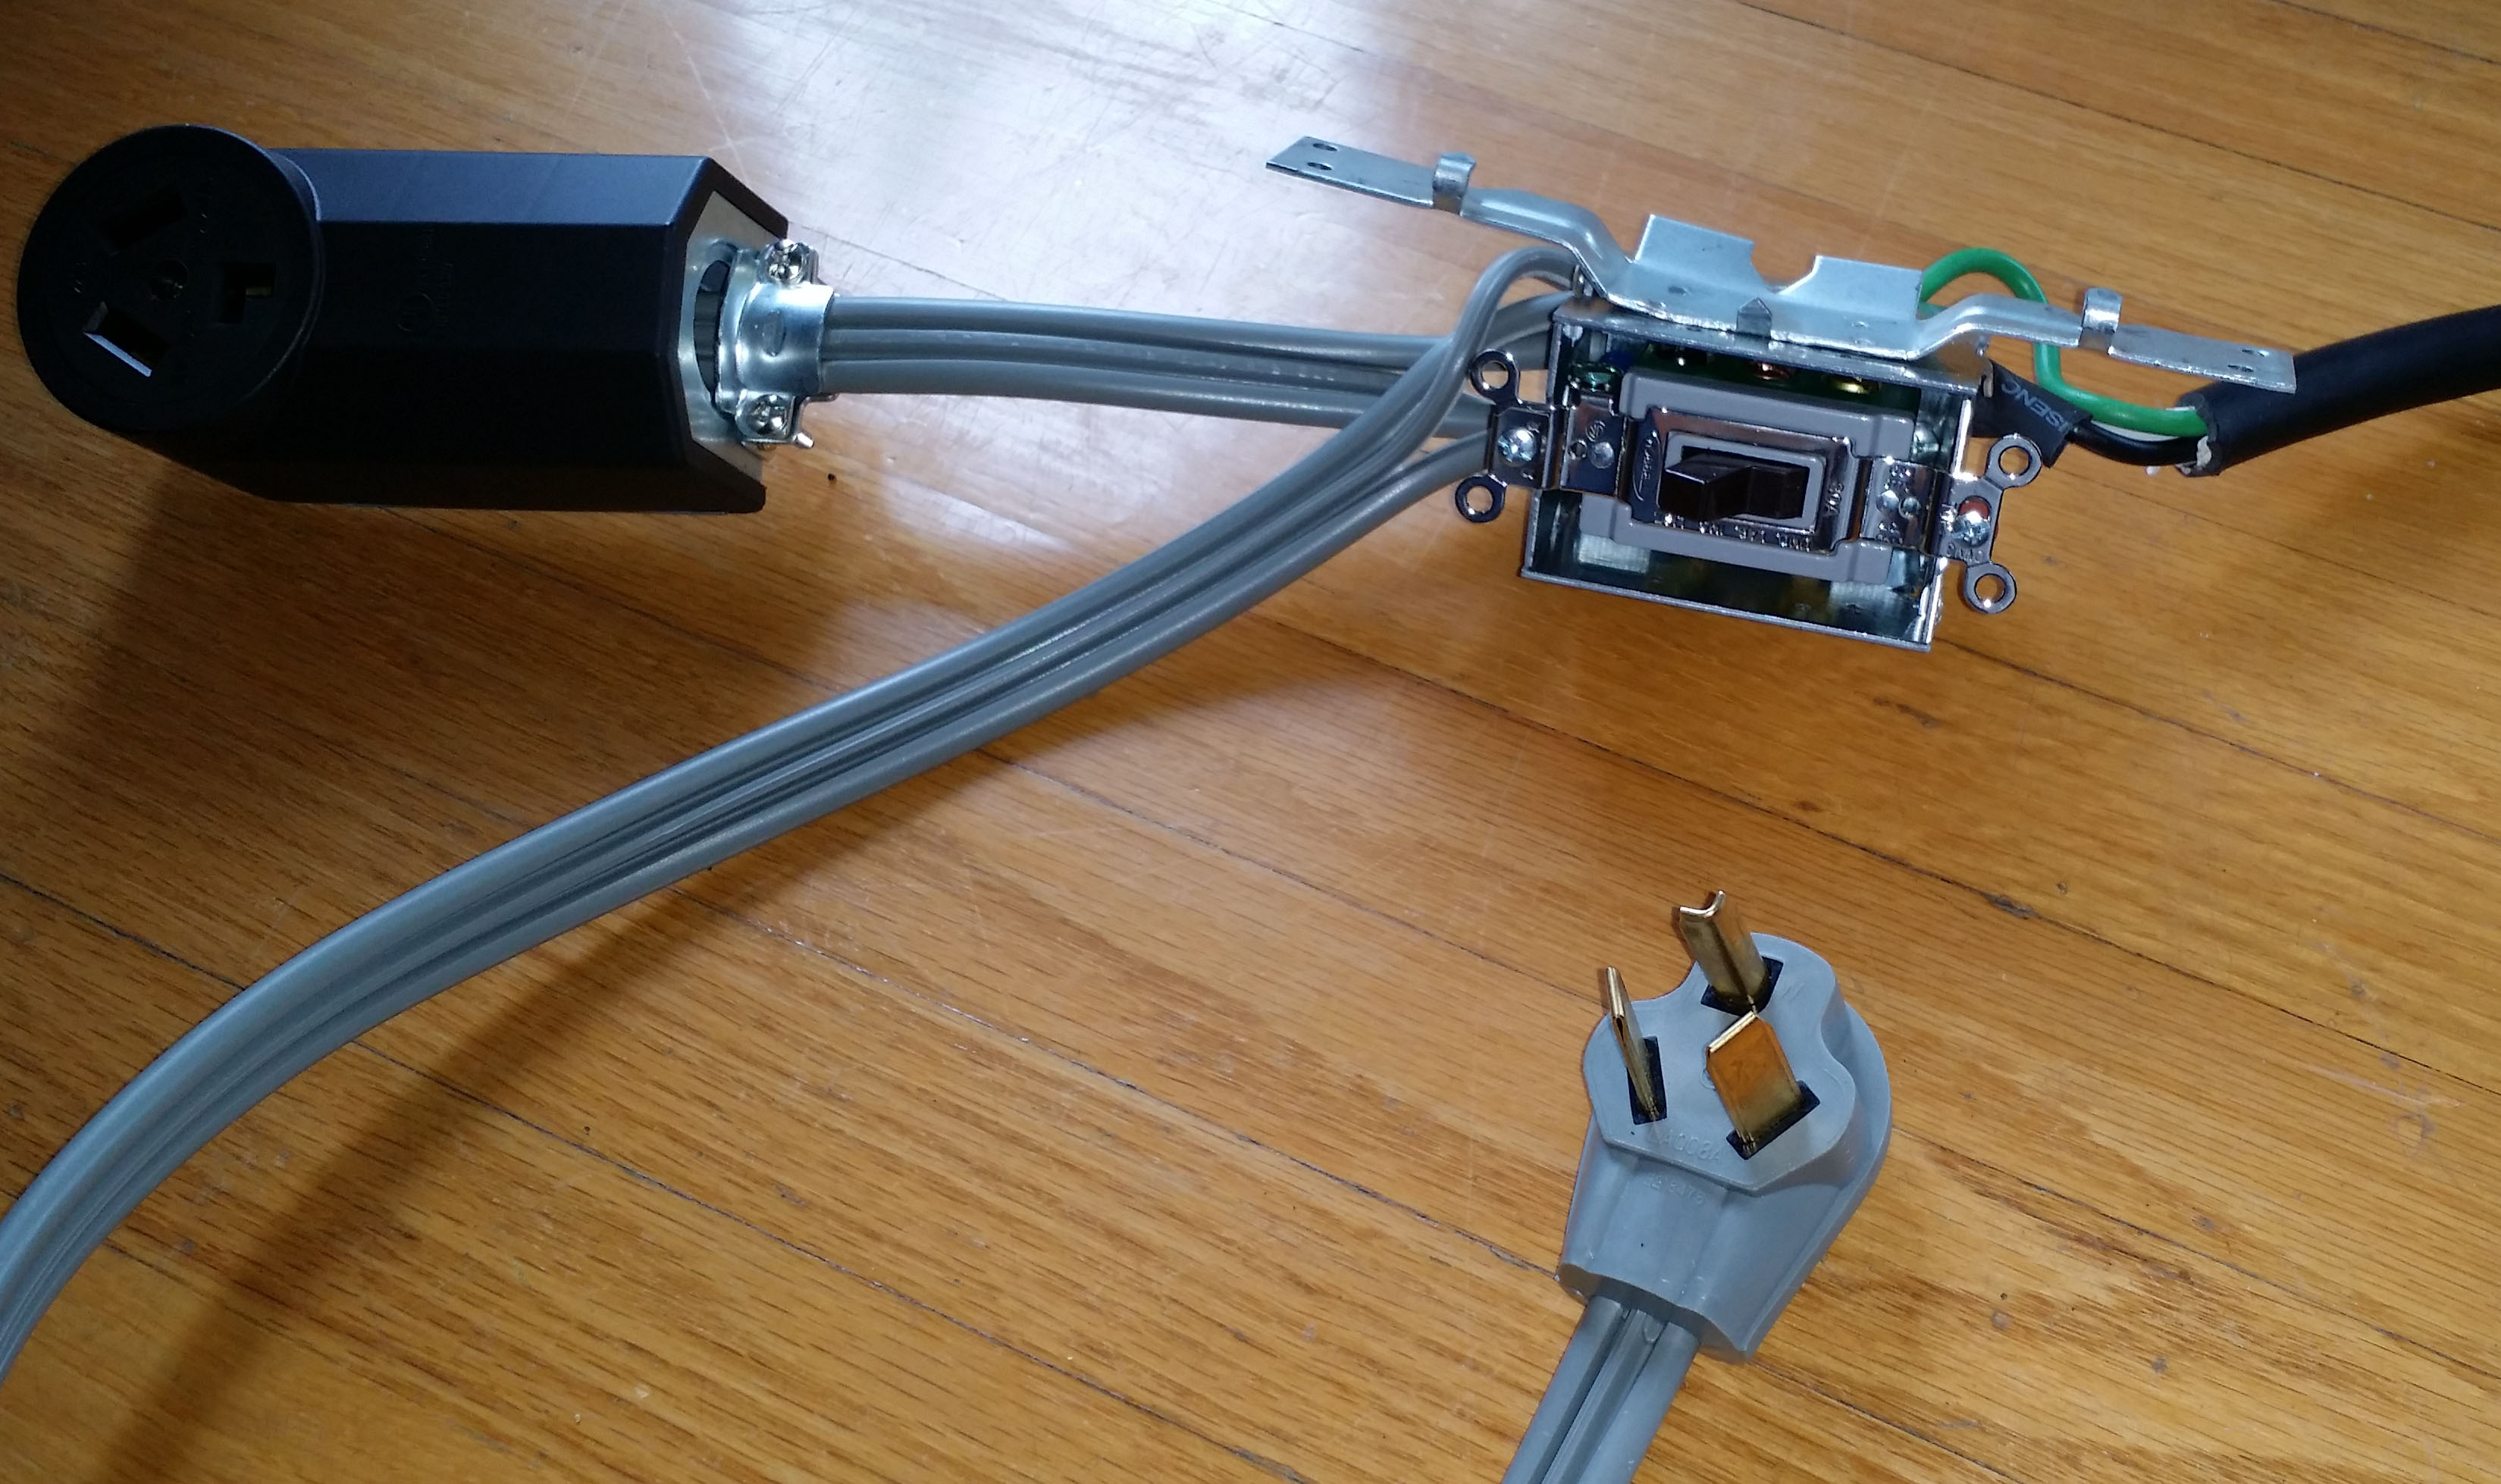
However by the time I bent these thick wires around the cable clamp it was kind of a tight fit.
Perhaps it would have been easier with a deeper switch box. The black screws (center pole) go to
the 220V plug. The copper colored screws (switch in left position when mounted) go to the 220V
receptacle for the dryer. The gold color screws (switch in right position)
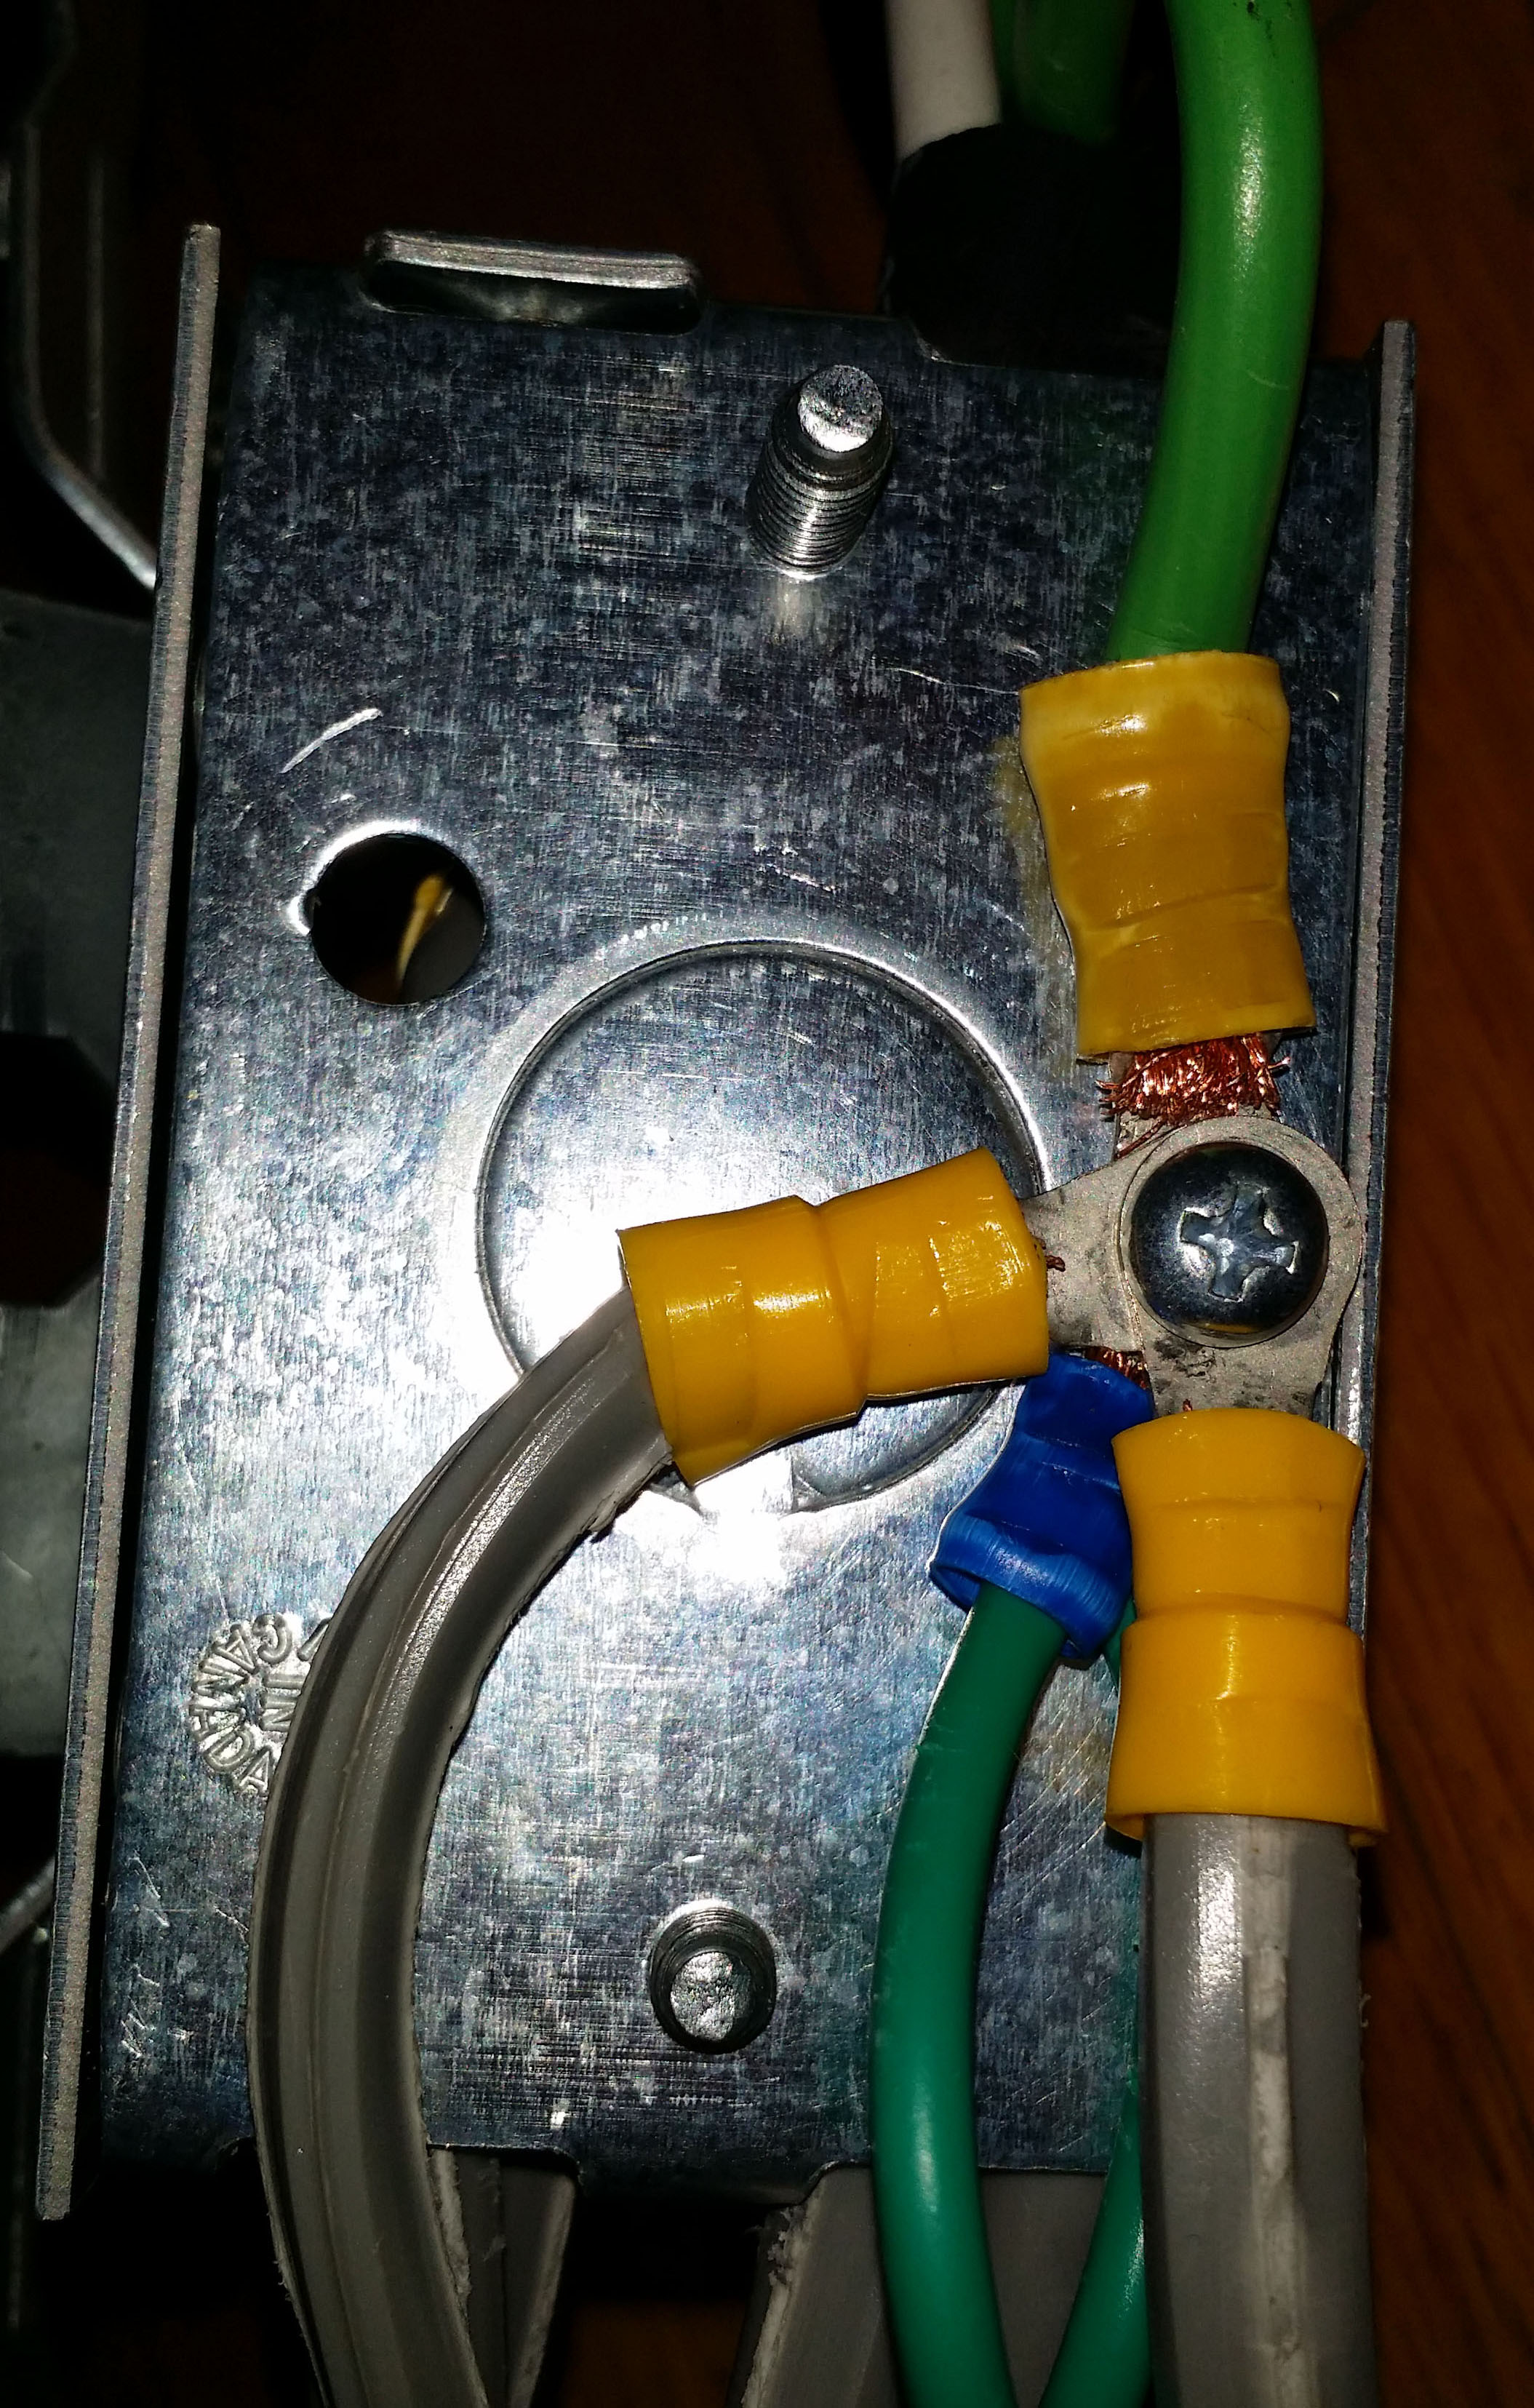
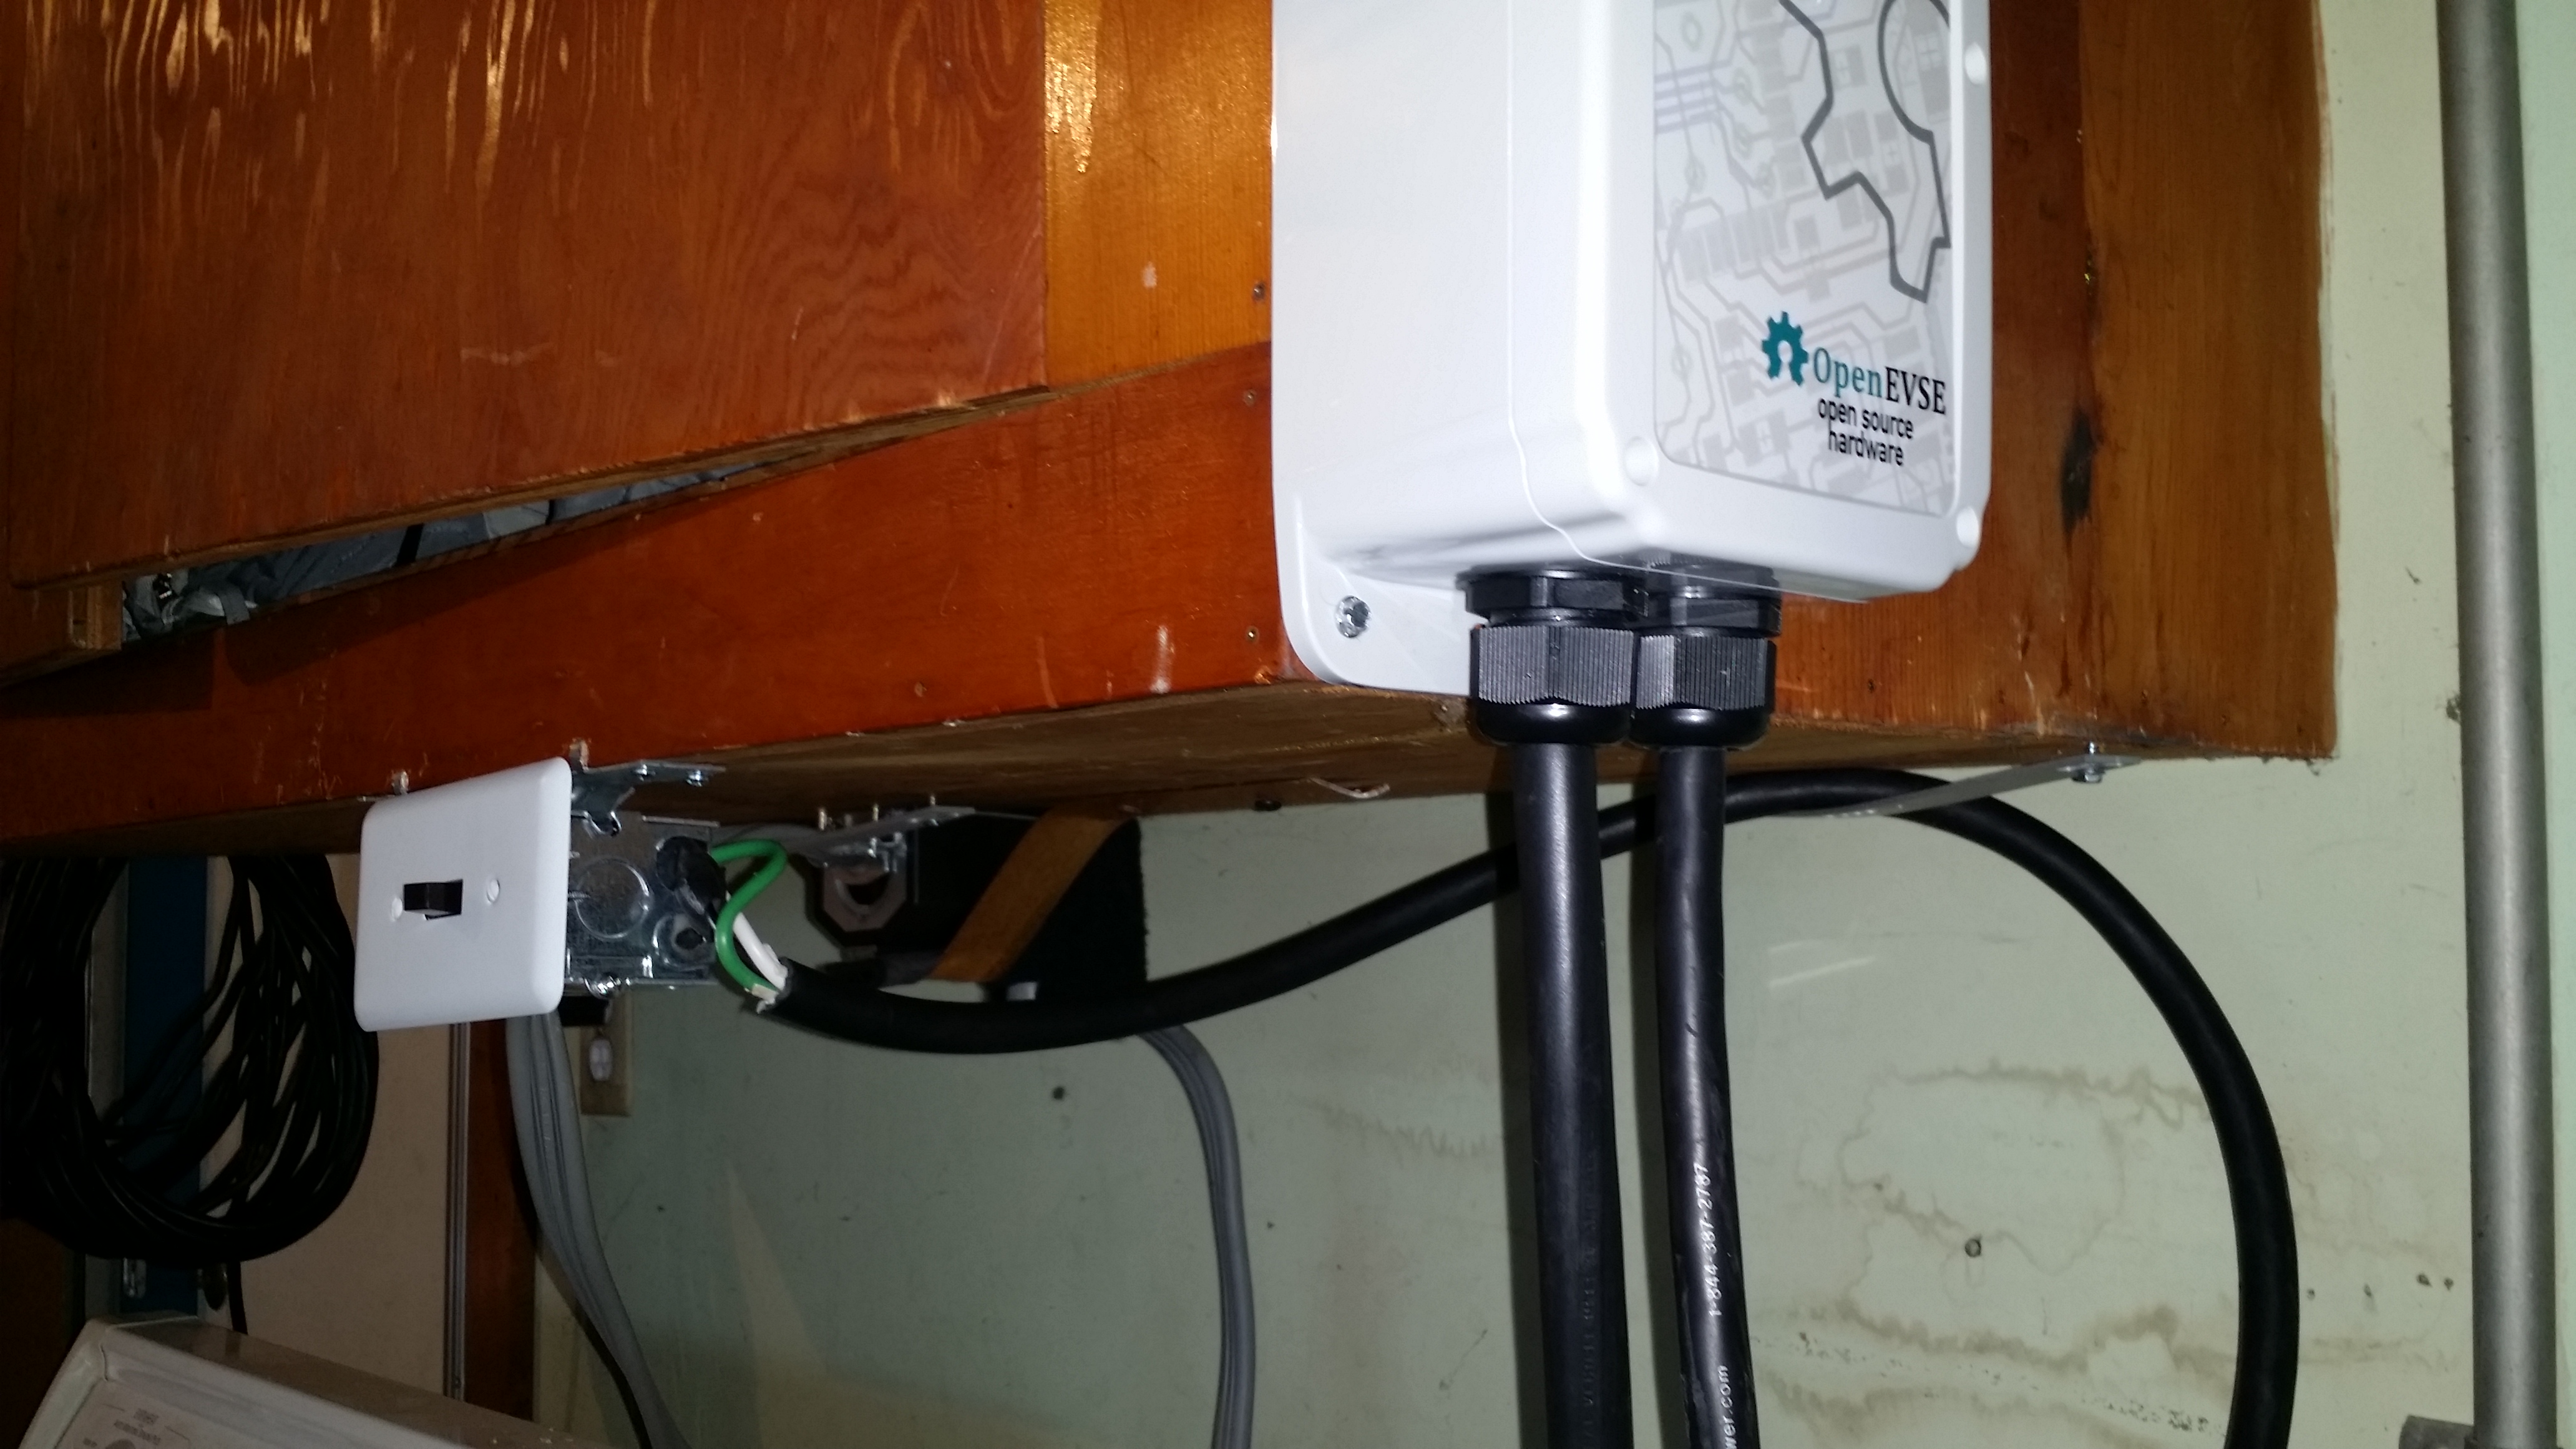
go to the OpenEVSE box using the 5ft 10 gauge cable. Since the switch provides a grounding
terminal, I connected that to the switchbox even though the mounting screws already provided
a pretty tight connection between the switch body and ground. The grounds are probably the most
important connection, so I used a nyloc nut and made sure it was well tightened.
These hugely thick wires are probably overkill since my car doesn't draw more than 14A,
but since the dryer breaker trip point is 30A I thought it wise to use wiring that can handle that much.
However by the time I bent these thick wires around the cable clamp it was kind of a tight fit.
Perhaps it would have been easier with a deeper switch box. The black screws (center pole) go to
the 220V plug. The copper colored screws (switch in left position when mounted) go to the 220V
receptacle for the dryer. The gold color screws (switch in right position)
go to the OpenEVSE box using the 5ft 10 gauge cable. Since the switch provides a grounding
terminal, I connected that to the switchbox even though the mounting screws already provided
a pretty tight connection between the switch body and ground. The grounds are probably the most
important connection, so I used a nyloc nut and made sure it was well tightened.